The following is an article companion to the Sage 100 Shorts video demonstration of the Auto Generate Invoices feature, presented by SWK consultant Anthony Ross. Watch the video below or continue reading for a full written walkthrough:
What is the Auto Generate Invoices Feature in Sage 100?
If your business processes a high volume of sales orders on a daily basis, manually creating invoices one by one is a bottleneck you do not have to live with. Auto Generate Invoices allows you to automatically select and batch-generate invoices from multiple sales orders at once in Sage 100 — saving time, reducing manual entry errors and giving your team more control over the billing process.
This feature lives within the Sales Order module and offers a wide range of filtering and selection criteria, so you can target exactly the orders you need to invoice for a given day, date range, customer group or salesperson.
Step-by-Step: Using Auto Generate Invoices in Sage 100
Here is a step-by-step breakdown of how to access and use Auto Generate Invoices in Sage 100, along with a few additional tips and tricks:
Step 1: Review Your Open Sales Orders
Start by navigating to Sales Order Entry to review the orders you are working with. In the demonstration, consultant Anthony Ross works with three open sales orders (orders 35, 36, and 37). For this example, two of those orders share the same ship date and are ready to be invoiced — the third is intentionally left out of the selection.
This step highlights one of the core benefits of the feature: you do not have to process every open order at once. Auto Generate Invoices gives you the tools to be selective.
Step 2: Navigate to Auto Generate Invoices Selection
Once you have reviewed your orders, exit Sales Order Entry and navigate to:
- Sales Order → Main → Auto Generate Invoices Selection
This opens the selection criteria panel, where you will define the parameters for your invoice batch.
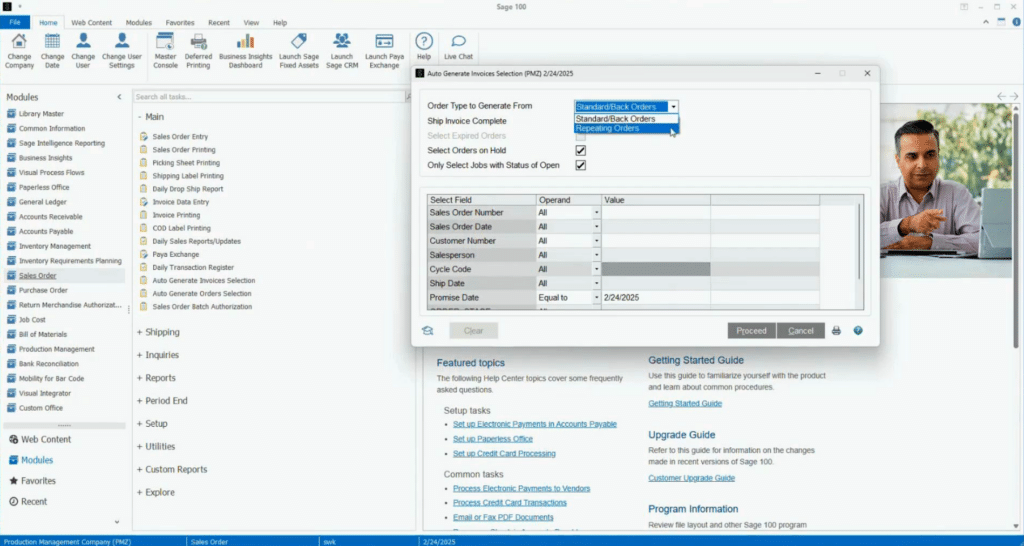
Step 3: Set Your Selection Criteria
The Auto Generate Invoices selection screen offers several filtering options, including:
- Sales Order Range
- Sales Order Date
- Ship Via
- Customer
- Salesperson
- Ship Date
- Promise Date
In this example, the filter is set by ship date — specifically targeting orders with a ship date of 2/24. This immediately narrows the batch to only the two relevant orders, excluding the third.
Pro Tip: You can combine multiple criteria to build highly targeted batches. For example, filtering by both salesperson and ship date lets you generate invoices for a specific rep’s book of business on a given day.
Step 4: Configure the Ship Order Complete Option
Before proceeding, take note of the Ship Order Complete checkbox at the top of the screen. This setting controls how ship quantities are handled when the invoice is created:
- Checked (Ship Order Complete): Sage 100 will automatically populate the ship quantity based on the order quantity. For example, if an order line has a quantity of one, the system will enter one in the ship amount field.
- Unchecked: The ship quantity field is left at zero, requiring manual entry. This is useful when partial shipments or manual quantity adjustments are expected.
You can also choose to include standard orders, back orders, or repeating orders in the batch depending on your needs.
NOTE: The Ship Order Complete setting applies to all orders in the batch. If you have mixed order types that require different ship quantity handling, consider running separate batches.
Step 5: Process the Selection
Once your criteria are configured, click Proceed. The system will generate a selection based on your filters — similar in concept to the invoice payment selection process on the Accounts Payable side of Sage 100.
At this point, you have the option to print a Selection Listing before generating the invoice batch. This report previews the orders included in your selection, giving you one final opportunity to confirm the batch is correct before committing.
Pro Tip: Always preview the Selection Listing before generating your invoice batch. It takes seconds and gives you a clear record of what is about to be processed — making it easy to catch anything unexpected before it hits Invoice Data Entry.
Step 6: Generate the Invoice Batch
After reviewing the Selection Listing, click to generate the invoice batch. Sage 100 will prompt you to confirm:
- Click Yes to generate the batch.
- Click No to clear the selection and start over if anything looks incorrect.
The system may also prompt you to confirm or adjust the next automatic invoice number. In most cases, you can accept the system-generated value and proceed.
Step 7: Review Generated Invoices in Invoice Data Entry
Once the batch is generated, navigate to Invoice Data Entry. Your invoices will be waiting — pre-populated with the correct ship quantities (if Ship Order Complete was selected) and ready for any final adjustments before posting.
In the demonstration, both target invoices were generated correctly with the appropriate ship amounts, confirming that the selection criteria and Ship Order Complete setting worked as intended.
Get More Out of Your Sage 100 Investment
The SWK Technologies team has deep expertise in Sage 100 and is ready to help your team take full advantage of the features already built into your ERP. Whether you are looking to streamline daily operations, solve a specific workflow challenge, or explore what else Sage 100 can do for your business, our consultants are here to help.
Contact SWK here to connect with a Sage 100 consultant and learn how we can empower your team to work smarter every day.